Hi everyone, and welcome to Part 3 of my tutorial on how to use Scrivener!
Today we’re talking about compiling your files until they’re in the manuscript format and ready to hand in to your critique partners or agents.
If you’re new to Scrivener, make sure you check out the other posts in the series:
And let’s get to it!
The last part I can teach you about when using Scrivener is compiling your document for print or for reader’s hands. This is the time where it stops being a bunch of different scenes and folders and it becomes a complete word document.
The first thing you need to know is that in Scrivener, when you want to make your manuscript into a document, it’s called COMPILING.
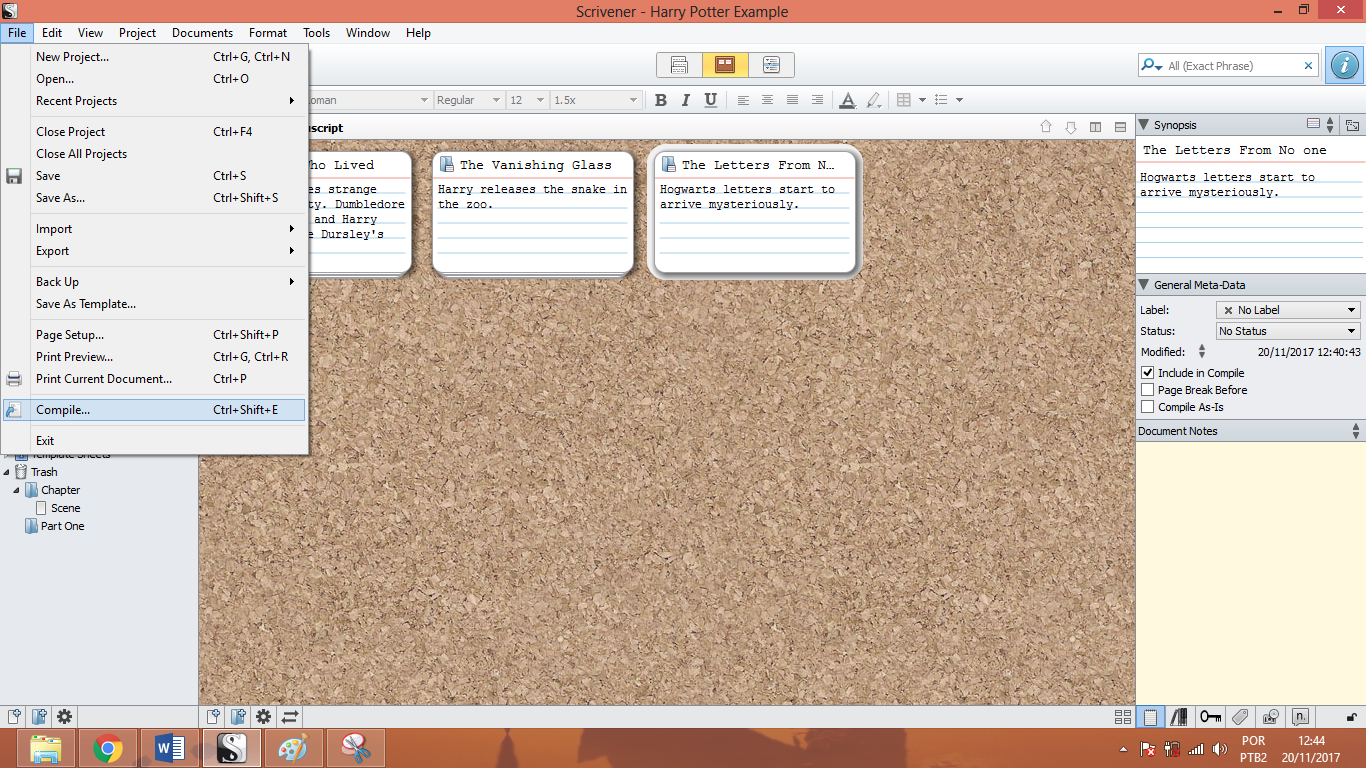
Here you can see the compiling screen easily. Once you click it, a completely new tab will open which will show all the compiling options Scrivener offers.
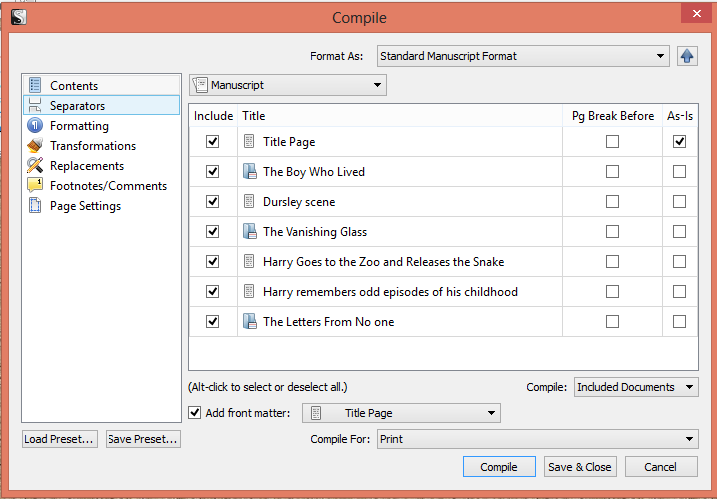
This is the first image that will show. You can see that in ‘contents’ we ave all the chapters and the scenes under each chapter. That way, you can see what is selected. Make sure you’ve selected all your documents. You can also include front matter like the title page.
Notice the: FORMAT AS. I usually click on the “Standard Manuscript Format” which makes it easily readable. If your manuscript has parts, you can use “Standard Manuscript Format with parts”.
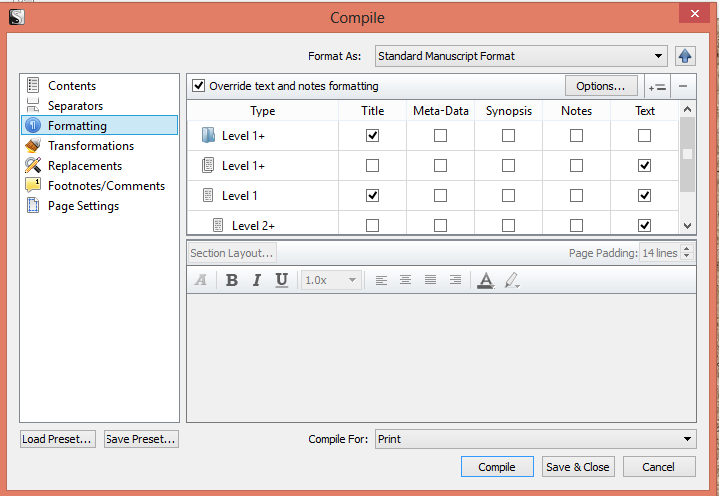
Another thing that gets me is the formatting. For example, my chapters don’t always include titles, so I uncheck the TITLE section on level 1, so it doesn’t include a title. Here you can see how it usually goes.
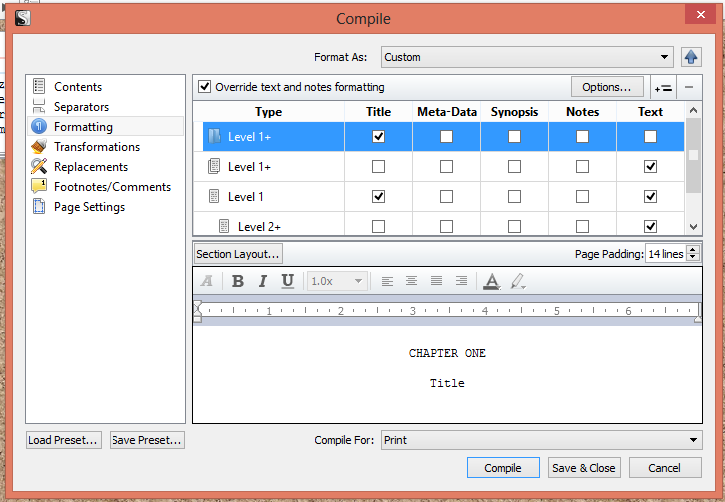
You can see how it reads CHAPTER ONE and Title underneath. If you don’t want titles, just uncheck it. You can also select the texts and put on the formatting you want, if you want to change fonts, make it bigger, etc.
I usually do not name my chapters, so I uncheck the box with title names, but make sure all the text boxs are checked just in case. You can also format your entry accordingly.
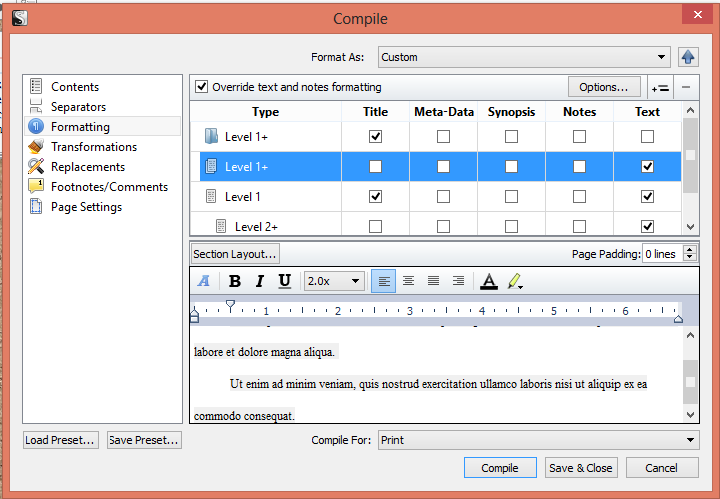
Here you see an example of text, and you can change it around, make it bold, or change the font. I leave it as is, as always.
On the “Compile For” section, make sure you save the correct format. I usually save for .docx, but you can save it as PDF or any other formats.
Of course, overall, this is a very simple tutorial, just to get you started on the basics of using Scrivener. This is in fact all the features I use constantly, but there are many other ways you can explore Scrivener and make it work perfectly for you. I think it’s one of the best writing tools out there, and I can’t recommend it enough. My writing changed completely after I began using it.
I hope you liked this tutorial, and let me know if you think there’s something missing!